
Martin & Mandy

Well there you go – if you'd asked me as a teenager if I would ever know what clunch stone was and I'd have laughed at you. Now I seem to know far too much about clunch, and many other things church architecture related, than is healthy. This stone is a hard chalk stone that was originally mined at Totternhoe in Bedfordshire where the thickest formation of this stone is found. There are also seams in Berkshire, Oxfordshire, Cambridgeshire and Hertfordshire, but these days the main source is Totternhoe.
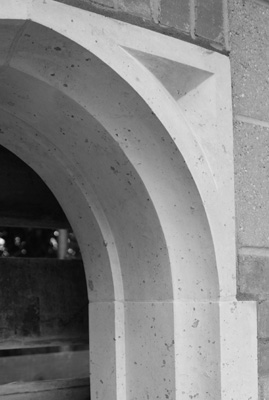
It's been used as a building material since Roman times, and will have reached a peak in use during the Norman Conquest, and hence most of St Bartholomew's stonework is clunch. It was particularly popular because it's one of the hardest stones that can be cut by hand. There's the potted history for you - the bad news is that if ignored the weather really kills the stone by water ingress followed by expansion due to freezing and salt crystallisation within the stone - the end result is the surface of it crumbles away. Adding cement to the surface of clunch also does not do it any favours as the chemicals in the cement react to the clunch, and we have quite a bit of that in St Bartholomew's. That's not to say the cement did not help to save the building, it's just that we have to deal with the after effects now. 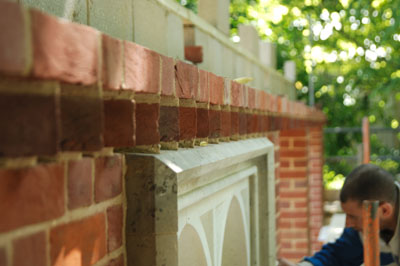 If you have a look at the stone window on the garage - that's clunch, and it's brand new and looks it as well – but if we ignore it for the next fifty years it will look like the rest of the church. All stonework needs to be regularly cared for and maintained, but the fact that clunch is such a relatively soft stone means it needs more care.
So what can we do? Well the first thing you can do is 'de-frass' the stone, put quite simply this means brush off all the loose bits and get down the core stone that's not been eaten into by the elements. Sometimes once you do this practically all the stonework has disintegrated and you are left with nothing more than a pile of dust on the floor, on other occasions you find that only the top 10 -20mm of stone is shot and the rest is fine.
Now the window on the garage looks really nice but it's clearly brand new and lacks history to it, part of the dream of living in a restored church is that it's several hundred years old and looks it - so starting by replacing all the stone we can find would firstly destroy the look and feel of the building and secondly cost a small fortune, so preservation is the key word here.
Once you have the loose layer removed, and assuming that you still have 80% of the stonework left, then you can provide a method of protection to the stone called shelter coating. This basically comes down to painting a layer of protection onto the stone that is the right colour and consists of a mix of ground marble, limestone, chalk and fine sand suspended in clean water. Several coats of this provide a sacrificial layer to protect the remaining stone against the elements. You can tinker with the colour of the shelter coat, as you can see the colour of the shelter coat in the picture here is not right at all, far too bright! If you have a look up at the West window on the bell chamber next time you are walking past you can see this test patch, and you can see a dramatic difference between the treated stone and the un-treated one below it. With the correct shelter coat and some pointing between the joints in the stone the sense of time and the character remains with the building and we avoid changing lots of stone.
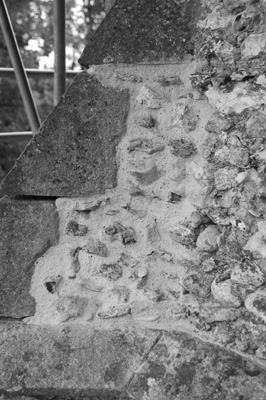
The other change that you can see if you look hard at the west wall of the bell chamber on the outside is a test area of pointing. We will end up with a patchwork over the tower because the whole tower does not need re-pointing.These patches will blend in over five years or so, but again it's important to get the right combination of lime .jpg) and sand in the mix so that it matches up with the original work on the tower. Just for extra entertainment the colour of the pointing changes over three to four weeks so just making sure the mix is correct takes the best part of a month. Anyway, the patch on the west wall which was our third test patch, matches nicely, and has the approval of the conservation officer, so that's what we will run with.
and sand in the mix so that it matches up with the original work on the tower. Just for extra entertainment the colour of the pointing changes over three to four weeks so just making sure the mix is correct takes the best part of a month. Anyway, the patch on the west wall which was our third test patch, matches nicely, and has the approval of the conservation officer, so that's what we will run with.
The garage in now nearing completion with a three part mix of hand made tiles being used on the roof. It now appears to 'squat' into the landscape and is looking at home there, once the doors go on it will look like a true Hertfordshire building. Now the crop has been harvested we have been able to get EDF in to give us some mains electric, so we can stop "borrowing" power from our neighbours!
 |
|
 |